Setting up an indoor rural Internet connection using 4G LTE
- Intro
- Calyx Institute
- Checking coverage
- Selecting hardware
- Installing the hardware
- Performance
- Costs
- Closing
Intro
This page shows how I set up a high-speed rural Internet connection on Sprint’s 4G LTE network using a Calyx Institute membership; the included MiFi 8000 hotspot and a Netgear 6000450 MIMO antenna.
This configuration demonstrates a middle-ground between the two other example configurations shown on this site:
- My primary Internet connection, which uses exterior antennas to connect to AT&T’s network
- My backup Internet connection, which is tethers to my Google Fi phone through a router
All three configurations are examples of how to obtain high-speed rural Internet access using mobile networks. If you’d rather skip the example configurations and dig straight into how to set up Internet access for your home, then I recommend starting with the Check Coverage page.
Calyx Institute
Calyx Institute is an organization that educates the public about and develops tools for privacy in digital communications. One of the perks of becoming a member is that they provide you with unlimited and unthrottled 4G LTE Internet access on Sprint’s network. As of March 20202, Sprint doesn’t even sell a similar service directly, though they do offer a 50GB mobile hotspot plan for about the same price as a Calyx Institute membership.
Saving money, and supporting this non-profit at the same time seemed like a win-win to me, so I decided to give them a try.
Calyx Institute can resell services on Sprint’s network because of agreements they made when they purchased Clearwire in 2013. Cory Doctorow wrote a blog post that contains more details.
Checking coverage
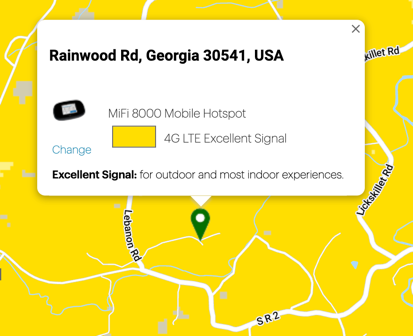
I followed the steps on the Check Coverage page to verify that I was within Sprint’s 4G LTE coverage area:

Selecting hardware
Calyx Institute’s FAQ indicates that you may only connect to Sprint’s network using the device that they provide:
Q: Can I take the SIM card out of the hotspot you provide and use it in another device?
A: Our reseller agreement with our hardware provider, Mobile Citizen, prohibits the use of third-party equipment. Members who are found by Mobile Citizen to be using third-party equipment will have their service terminated.
As of March 2020, they offer two devices, based on your membership level:
| Plan Name | Device | External antenna support | Price |
|---|---|---|---|
| Contributor | Coolpad Surf | No | $150 every 3 months, or $500 for the first year, then $400/year |
| Contributor Plus | Inseego Mifi 8000 | Yes | $175 every 3 months, or $600 for the first year, then $500/year |
The Inseego Mifi 8000 is the more expensive option, but unlike the Coolpad Surf, it comes with external antenna connectors. I wanted to keep my antenna options open, so I opted for the “Contributor Plus” membership level. As the Performance section shows, this turned out to be a good decision. Using an external antenna helped a lot with performance.
Installing the hardware
Five days after I signed up, my Inseego Mifi 8000 arrived. Time to activate service.
MiFi 8000 device activation
The MiFi 8000 came with straight-forward setup instructions, so I won’t reproduce them here. That said, there was a problem activating the device that I want to mention, in case it helps someone else out.
Here’s what I did in my initial attempt to activate the device:
- Charged the device to 100%
- Took it to a location where I thought it would get a good signal from Sprint (the top floor of my house) and powered it on.
- Waited for it to try to activate itself, and watched it fail
I tried powering the device off and on again, but activation again failed.
Finally, I popped off the back panel, removed the battery, and reinsert it. After powering the device back on, it was able to activate within a couple of minutes, and I was online.
I guess the MiFi 8000 got into a bad state somehow. Fortunately, it’s been problem-free ever since this initial activation hiccup.
Accessing the antenna ports
The MiFi 8000’s two TS9 antenna ports are on opposite sides of the USB-C charging port. They’re covered by plastic caps that I was able to remove by after some prodding with a paperclip.
Here’s a video with a more detailed explanation on how to remove the antenna caps:
Antenna options
This site’s Hardware Selection section provides tips on how to select an antenna, and the Installation Guide shows how to find the best location and alignment for an antenna.
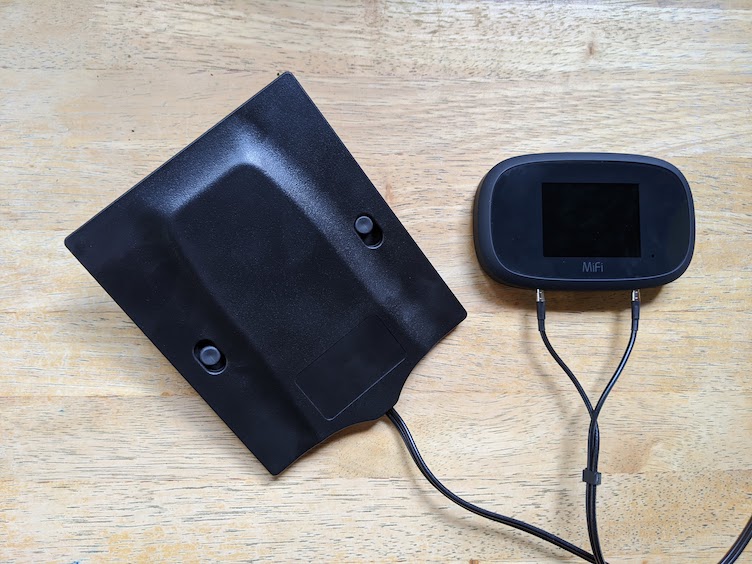
I tried out both the MiFi 8000’s built-in antennas and the Netgear 6000450 MIMO antenna.
The Netgear antenna plugs directly into the TS9 ports on the MiFi 8000, so no extra cabling is necessary. The antenna is only rated to have up to 2.5dBi of gain (in contrast with the 10.5dBi and 11dBi antennas that I used for my primary Internet connection), but still managed to boost performance considerably, as described in the next section.
I tried out different spots in and around my home and found a spot on the top floor that got the best speed for both antenna configurations.
Performance
Four Sprint configurations compared
Between the setup in this page, and tethering configurations evaluated for my backup Internet connection, I’ve accumulated performance figures for four different Sprint LTE configurations at the same house. Here’s a comparison of all four:
| Internet connection | WiFi tethering to cell | USB tethering to cell | MiFi 8000 built-in antennas | MiFi 8000 with Netgear antenna |
|---|---|---|---|---|
| Download speed | 5.11Mbps | 15.01Mbps | 22.94Mbps | 99.08Mbps |
| Upload speed | 0.09Mbps | 0.44Mbps | 1.34Mbps | 1.78Mbps |
| Round-Trip Latency | 40ms | 39ms | 39ms | 29ms |
| Initial setup cost | $0 | $53 | $170 | $207 |
The MiFi 8000 with Netgear antenna configuration was the best performing option by a surprising margin. It was interesting to see how much performance improved as the configuration evolved.
Fast downloads and slow uploads
All four of the Sprint configurations shown in the previous section have a pattern of downloads being significantly faster than uploads. For example, the fastest configuration is 490% as fast on downloads, but only 14.5% as fast on upload as my primary Internet connection, which works on AT&T’s LTE network:
| Internet connection | MiFi 8000 with external antenna | AT&T LTE Internet Connection |
|---|---|---|
| Download speed | 99.08Mbps | 20.23Mbps |
| Upload speed | 1.78Mbps | 12.27Mbps |
| Round-Trip Latency | 29ms | 44ms |
Why the mixed results? I think they’re caused by a difference in what AT&T and Sprint have optimized their networks for. As PCMag noted in their 2019 Fastest Mobile Networks survey, Sprint decided to prioritize download speed over upload speed:
Sprint really struggled until it turned on its Spark network in 2016 and 2017. Look at the upload and download lines for Sprint between 2017 to 2019. Downloads shoot up—and upload speeds actually reduce. That’s because Spark, unlike other networks, lets Sprint devote much more spectrum to downloads than uploads, optimizing itself for download speeds.
Costs
Here are the upfront costs to set up this configuration:
| Item | Cost |
|---|---|
| 3-month Calyx Institute Contributor Plus membership | $175.00 |
| Netgear 6000450 MIMO Antenna | $32.09 |
| Total | $207.09 |
The recurring cost is $175 every 3 months, or $600 for the first year, then $500/year.
Closing
I hope this example configuration was helpful. Feel free to replicate this configuration if you feel that it suits your location. Or, if you want to explore your options, then I recommend going to the Check Coverage page.
« Previous: Tethering to a Cell Phone Next: Outdoor Installation »
